

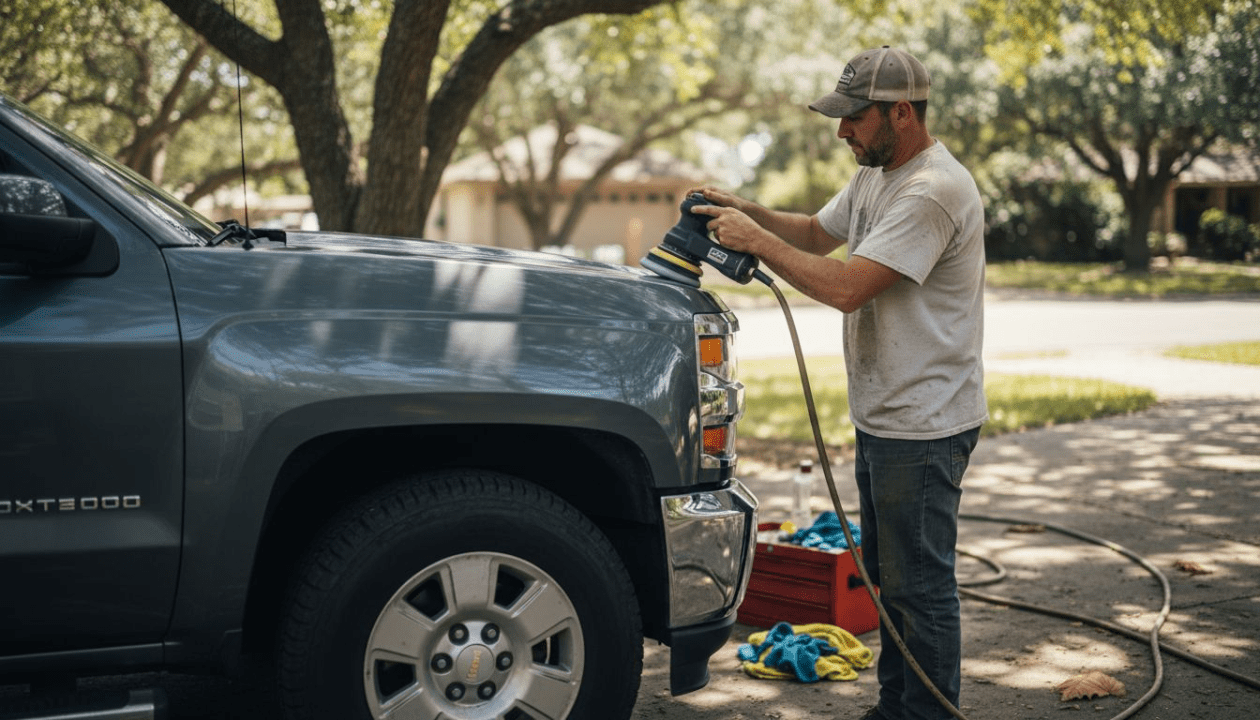
Chevy truck owners often struggle with DIY detailing, wasting time and money on methods that produce mediocre results or even damage paint. Professional detailing costs hundreds of dollars per visit, but achieving showroom quality at home is entirely possible with the right approach. This comprehensive guide breaks down preparation, step-by-step exterior and interior techniques, common pitfalls to avoid, and maintenance schedules that keep your truck looking pristine year-round while protecting your investment.
Table of Contents
- Prerequisites And Preparation Before Detailing
- Exterior Detailing Steps For Chevy Trucks
- Interior Detailing Steps For Chevy Trucks
- Common Mistakes And Troubleshooting In Chevy Truck Detailing
- Maintenance, Timing, And Expected Results For Chevy Truck Detailing
- Explore FullSizeChevy For All Your Truck Detailing Needs
Key Takeaways
| Point | Details |
|---|---|
| Stepwise approach protects paint | Following proper preparation and correction sequences prevents costly damage and achieves professional results. |
| Essential tools reduce errors | Quality microfiber towels, clay bars, and orbital buffers deliver superior outcomes compared to improvised equipment. |
| Interior requires UV protection | Treating vinyl and dashboard surfaces with UV-resistant products prevents cracking and fading over time. |
| Common mistakes cause damage | Using abrasive chemicals or wrong polishing pads can permanently burn through clear coat. |
| Regular maintenance sustains value | Waxing every three to six months preserves shine and extends paint life significantly. |
Prerequisites and Preparation Before Detailing
Thorough preparation sets the foundation for successful detailing and prevents frustrating mistakes that waste hours of work. Before touching your Chevy truck’s paint, gather essential tools and create an optimal workspace.
You need specific equipment to achieve professional results. Start with a collection of high-quality microfiber towels in different sizes for washing, drying, and buffing. Clay bars remove embedded contaminants that washing alone cannot eliminate. An orbital buffer or dual-action polisher makes paint correction manageable for beginners while delivering results that hand polishing cannot match. Premium automotive wax or sealant protects your work for months. Interior cleaning requires dedicated products like foam upholstery cleaner, vinyl protectant with UV blockers, and small detailing brushes for crevices.
Workspace matters more than most truck owners realize. Park in a shaded area or garage to prevent cleaning products from drying too quickly on hot surfaces, which creates streaks and residue. Ensure good ventilation when using chemical cleaners indoors. Adequate lighting helps you spot contaminants and paint imperfections during inspection.
Properly masking trim and removing or covering belts and jewelry reduces risks of accidental damage or contamination during the detail process. Use quality automotive masking tape on rubber trim, emblems, and badges before polishing. Take off watches, rings, and belt buckles that could scratch paint. Wear nitrile gloves to protect your hands from chemicals and prevent skin oils from transferring to freshly cleaned surfaces. Safety glasses shield your eyes when buffing or using spray cleaners.
Pro Tip: Before starting any correction work, tape off a small test section on a hidden panel like the inside of your tailgate. Practice your polishing technique there first to dial in the right pad, compound, and pressure for your specific mastering paint care for Chevy trucks needs without risking visible damage.

Organize your must-have detailing gear for Chevy trucks within easy reach before beginning. Lay out products in the order you will use them. Have a spray bottle of water nearby for diluting products or misting towels. This preparation saves time and prevents the common mistake of leaving products on surfaces too long while searching for the next tool. Following professional detailing preparation tips transforms your workspace into an efficient detailing bay.
Exterior Detailing Steps for Chevy Trucks
Moving from preparation to execution, exterior detailing follows a specific sequence that builds on each previous step. Skipping stages or working out of order compromises results and can damage your truck’s finish.
-
Wash Thoroughly – Start with a complete two-bucket wash using pH-neutral truck soap. One bucket holds soapy water, the other clean rinse water. This method prevents dragging dirt back onto paint. Work from top to bottom, rinsing your wash mitt in the clean bucket after each panel. Pay extra attention to wheel wells, rockers, and the lower portions where road grime accumulates. Rinse completely and dry with clean microfiber drying towels to prevent water spots.
-
Clay Bar Treatment – Even after washing, your paint contains embedded contaminants like tar, industrial fallout, and tree sap. Run your hand over the paint; it should feel smooth as glass. Any roughness indicates contamination. Spray a section with clay lubricant and gently glide the clay bar across the surface using light pressure. The clay picks up particles washing cannot remove. Fold and knead the clay frequently to expose clean surfaces. This step is critical before polishing.
-
Paint Correction – Using an orbital buffer or rotary polisher with appropriate pads and compounds significantly improves paint correction results compared to hand polishing alone. Apply a small amount of cutting compound to a foam cutting pad. Work in two-foot sections using overlapping passes at medium speed. Keep the pad flat against the surface and maintain constant motion to avoid burning through clear coat. Wipe away residue with a clean microfiber towel and inspect your work under good lighting. Using a step-by-step detailing process including cleaning, clay bar treatment, polishing, and waxing can make a vehicle’s paint look closer to factory-new.
-
Apply Wax or Sealant – Protection is the final exterior step. Apply a thin, even coat of carnauba wax or synthetic sealant using a foam applicator pad. Work in the shade and follow product instructions for dwell time, typically five to ten minutes. Buff off with a clean microfiber towel using light, circular motions. This layer shields paint from UV rays, oxidation, pollutants, and minor scratches.
| Method | Cost | Time Required | Results | Best For |
|---|---|---|---|---|
| Hand Polishing | Low ($20-40 in compounds) | 6-8 hours | Moderate improvement, inconsistent correction | Light swirls, small areas |
| Machine Polishing (Orbital) | Medium ($150-300 for buffer + products) | 3-4 hours | Professional-grade correction, even finish | Most paint defects, full truck details |
| Machine Polishing (Rotary) | Medium to High ($200-500) | 2-3 hours | Maximum correction, requires skill | Heavy oxidation, experienced users |
Pro Tip: Chevy truck paint varies between model years and trim levels. Newer clear coats are harder and require more aggressive compounds, while classic trucks often have softer single-stage paint. Test your compound and pad combination on an inconspicuous area first. If you are not removing defects after several passes, step up to a more aggressive pad or compound. Conversely, if you are creating new micro-marring, reduce pressure or switch to a softer pad.
The ultimate prepping checklist for Chevy trucks ensures you do not miss critical steps before modification or detailing work. For more detailed techniques and visual guides, explore DIY mod and detailing guides for Chevy trucks and stay updated with the latest Chevy truck detailing tips. Advanced professional paint correction methods can help tackle the toughest paint challenges.
Interior Detailing Steps for Chevy Trucks
With the exterior complete, shift focus inside where your Chevy truck’s cabin requires equally detailed attention to maintain comfort and value. Interior work addresses different materials and challenges than exterior paint.
Start by removing floor mats and thoroughly vacuuming all surfaces. Use crevice tools to reach under seats, between console gaps, and along door jambs where dirt and debris accumulate. Pay special attention to seat tracks and pedal areas. Empty and vacuum the truck bed if you detailed the exterior tonneau or cab area.

Interior cup holders are among the dirtiest spots and require detailed cleaning using tools like microfiber cloths, skewers, and liners for best results. Remove cup holder inserts if possible and wash them separately. Use foam-tipped swabs or wooden skewers wrapped in microfiber to clean air vents, which collect dust and grime that recirculates when you run climate controls. Small detailing brushes work perfectly for textured dashboard areas and around controls.
Upholstery and carpet cleaning transforms the cabin’s appearance. Spray foam upholstery cleaner on seats and carpets, working it in with a soft brush. The foam lifts embedded dirt and stains without over-wetting the material, which can cause mildew. Let it dwell according to product instructions, then extract with a shop vacuum or wipe away with clean microfiber towels. For stubborn stains, repeat the process or use a dedicated carpet extractor.
Use of UV-resistant protectants for dashboard and vinyl maintains material flexibility and prevents cracking over time. Apply a thin, even coat to all vinyl, plastic, and rubber surfaces including the dashboard, door panels, center console, and steering wheel. These protectants restore a like-new appearance while creating a barrier against sun damage that causes fading and brittleness. Choose a matte or satin finish product rather than high-gloss options that create distracting reflections in the windshield.
Pro Tip: Chevy truck interiors in warm climates suffer accelerated UV damage. Apply protectant to your dashboard and door panels every four to six weeks during summer months, even if you perform full details less frequently. This simple habit prevents irreversible cracking and fading that plague trucks parked outdoors. Use a dedicated UV protectant rather than multi-purpose products for maximum protection.
Clean windows last using glass cleaner and dedicated glass microfiber towels that do not leave lint. Spray cleaner on the towel rather than directly on glass to prevent overspray on interior surfaces. Wipe in straight lines rather than circles to avoid streaking. Lower windows slightly to clean the top edge where grime accumulates.
Explore essential interior detailing tools and proven DIY interior cleaning techniques for more advanced methods. For product recommendations, review detailed interior cleaning tips and research UV-resistant interior protectants that match your climate and truck usage.
Common Mistakes and Troubleshooting in Chevy Truck Detailing
Understanding what can go wrong helps you avoid costly errors that damage your truck’s finish or require professional correction. Many detailing mistakes are simple to prevent with proper knowledge.
Common mistakes include using abrasive chemicals or improper polishing tools that can burn through the clear coat causing permanent paint damage. Household cleaners like dish soap strip protective wax and can dull paint over time. Wheel cleaners designed for bare aluminum or chrome will etch painted wheels. Always verify products are safe for automotive finishes before application. When in doubt, test in an inconspicuous spot.
Skipping or improperly applying masking tape leads to polish residue on trim and emblems that requires tedious removal. Tape off rubber seals, plastic trim, and badges before any machine polishing. Remove tape promptly after finishing each section to prevent adhesive residue. If you accidentally get compound on trim, remove it immediately with a damp microfiber towel before it dries.
Selecting the wrong polishing pad causes either ineffective correction or clear coat damage. Foam pads come in different firmness levels: cutting pads for heavy correction, polishing pads for moderate defects, and finishing pads for final refinement. Using a cutting pad with finishing polish wastes product and time. Conversely, aggressive compound on a finishing pad risks uneven results. Match pad firmness to your compound’s cut level and the severity of defects you are correcting.
Excessive polishing pressure or too many passes in one spot generates heat that burns through clear coat. This mistake shows as a hazy or dull spot that cannot be corrected without repainting. Keep your buffer moving constantly and use only enough pressure to keep the pad in contact with the surface. Let the machine and compound do the work. If you are leaning heavily on the buffer, you are using too much pressure.
Overlooked interior crevices collect grime that undermines your detailing efforts. Check door jambs, seat belt anchors, under seat adjustment levers, and around pedals. These areas show during normal use and immediately reveal incomplete work. Use small brushes and folded microfiber towels to address tight spaces.
Avoid these common Chevy truck detailing mistakes and leverage technical detailing troubleshooting tips to handle challenges specific to full-size trucks. Learning to avoid paint damage from polishing protects your investment and ensures long-lasting results.
Maintenance, Timing, and Expected Results for Chevy Truck Detailing
Understanding the time commitment, cost efficiency, and ongoing maintenance requirements helps you plan realistic detailing schedules that keep your Chevy truck in premium condition without overwhelming your schedule or budget.
A complete DIY detail typically requires four to six hours depending on your truck’s size, condition, and the extent of paint correction needed. Breaking the work into exterior and interior sessions across two days makes the process more manageable. Maintenance details between full corrections take two to three hours and focus on washing, quick interior cleaning, and reapplying wax.
| Aspect | DIY Detailing | Professional Detailing |
|---|---|---|
| Initial Cost | $200-400 (tools + products) | $300-600 per visit |
| Time Investment | 4-6 hours per full detail | Drop off for 4-8 hours |
| Ongoing Cost | $30-50 per detail (products only) | $300-600 per visit |
| Annual Cost (4 details) | $120-200 | $1,200-2,400 |
| Skill Development | Builds expertise over time | No learning required |
| Customization | Full control over products and methods | Limited input on process |
Regular waxing extends paint life and preserves the glossy finish, protecting full-size truck paint from environmental damage and oxidation. Apply fresh wax every three to six months depending on your climate and how the truck is stored. Trucks parked outdoors in sunny regions need more frequent protection than garage-kept vehicles in moderate climates. Inspect your wax layer by spraying water on the hood; proper protection causes water to bead tightly and roll off easily.
Maintenance washing should occur every two weeks to prevent contaminant buildup that embeds in paint. Use the two-bucket method with quality truck soap. Quick interior wipe-downs weekly prevent dirt accumulation that requires deep cleaning. Vacuum floor mats and seats monthly. Reapply interior UV protectant every four to six weeks during peak sun months.
Pro Tip: Schedule a full wax application before extreme seasonal conditions hit your area. Apply wax in late fall before winter road salt and freezing temperatures, and again in early spring before intense summer UV exposure. This timing maximizes protection when your truck faces the harshest environmental challenges. Missing these windows leaves paint vulnerable during critical periods.
Mobile detailing services offer convenience but regular DIY maintenance is necessary to keep a Chevy truck in pristine condition between professional visits. Combining quarterly DIY maintenance details with an annual professional correction balances cost, convenience, and results for truck owners who want showroom quality without constant expense.
Expected results from proper detailing include dramatically improved paint clarity and depth, elimination of minor scratches and swirl marks, restored interior surfaces, and protection that maintains these improvements for months. Well-maintained trucks command higher resale values and provide greater pride of ownership. The initial time investment in learning proper techniques pays dividends through years of preserved appearance and reduced need for professional correction.
Develop smart maintenance for Chevy trucks that balances preservation with practical use. Implementing an effective waxing and maintenance routine keeps your truck looking its best year-round without excessive effort.
Explore FullSizeChevy for All Your Truck Detailing Needs
Now that you have the knowledge to detail your Chevy truck like a professional, take your passion further with resources designed specifically for full-size truck enthusiasts. FullSizeChevy offers comprehensive DIY mod guides that complement your detailing skills with modification techniques, helping you build the truck you have always envisioned.

Join a vibrant truck culture restoration community where members share build threads, troubleshoot challenges, and celebrate restoration milestones. Whether you are maintaining a daily driver or restoring a classic square body, you will find experienced enthusiasts ready to help. Gear up with must-have Chevy truck gear including quality detailing tools, apparel, and accessories that show your dedication to full-size truck culture. Explore our blog, forums, and guides to make every aspect of Chevy truck ownership more rewarding.
How to Detail Chevy Truck FAQ
How often should I wax my Chevy truck?
Apply fresh wax every three to six months depending on climate and storage conditions. Trucks parked outdoors in sunny regions need quarterly waxing, while garage-kept vehicles in moderate climates can extend to six months. Test water beading on your hood to determine when protection has degraded and reapplication is necessary.
What tools are essential for a beginner detailer?
Start with quality microfiber towels, pH-neutral truck soap, clay bar kit, dual-action polisher, foam pads in varying firmness, compound and polish, carnauba wax, and interior-specific cleaners including upholstery foam and UV protectant. These fundamentals handle most detailing tasks without requiring professional-grade equipment.
Can I use household cleaners on my Chevy’s interior?
Avoid household cleaners that contain ammonia, bleach, or harsh degreasers as they damage automotive vinyl, leather, and plastics. Dish soap strips protective coatings from surfaces. Always use products specifically formulated for automotive interiors to prevent discoloration, cracking, or material degradation.
How long does a full DIY detail typically take?
Expect four to six hours for a complete exterior and interior detail including paint correction. Breaking the work into separate exterior and interior sessions across two days makes the process less exhausting. Maintenance details without heavy correction take two to three hours.
What’s the best way to avoid swirl marks when polishing?
Use clean pads and microfiber towels for every section, never reusing contaminated materials. Keep your buffer moving constantly without excessive pressure. Work in adequate lighting to spot defects immediately. Always finish with a fine polish and soft pad to refine the surface and remove any micro-marring from correction steps.
Recommended
- Mastering Paint Care for Your Beloved Chevy: Tips From The Chevy Community
- The Ultimate Checklist for Prepping Your Chevy Truck for Modifications – FullSizeChevy.com
- Top Technical Tips for Classic Chevy Truck Restoration and Modern Upgrades
- 12 Restoration Pitfalls to Dodge on Your Chevy, GMC, or Cadillac
Article generated by BabyLoveGrowth
Talk trucks with other owners
Post your truck, your build, or the problem you are chasing and get real answers from full-size GM truck owners in the FSC forum.
Open the FSC Forum →
